Wednesday, August 13, 2014

House Front - BEFORE Photos

August 2014

Next year (2015) we are going to focus on updating and improving the front of our house.

Here are some Before photos


Our house is a typical 2 storey, wood sided house with some added red clay brick accents - fireplace and facing.

We have arches and clay tile on the front entrance porch.

There are steel double doors which we paint whenever we paint the exterior of the house.

Currently the paint is BM Raccoon Fur with a bright white trim.


The doors are painted BM Sundried Tomato.


Next Reno - Negotiations have begun...

Wednesday, August 13, 2014

My DH and I like to do a house reno every other year.  Schedule and Budget permitting of course.

We've been in our house 16 years now and we've done a lot.  But we still have a huge list of things that "need" to get done and also stuff we'd "like" done

So every year, in the spring, we sit down and prioritize the list.

Here's our WISH LIST (in no particular order):

Kitchen - Cabinets and countertops
Master Bath - total gut
Laundry Room - total gut
Outside Front - Landscaping
Paint the Exterior
Replace Windows - not all just 3 large ones on front of house
Outside Backyard (was done 10 years ago but needs some minor work)
Garage Organization - finish walls and install shelving/storage
Misc Repairs and Organization throughout house (on going)

I'm sure it looks familiar to a lot of you!

My Wish....

This year I really wanted to put in a putting green in our backyard.  I thought it would be a fun thing to have for entertaining and we still have a teenage boy at home who is an avid golfer.
We don't have a sprinkler system (no real need for it here in the rainy west coast) and we don't water our grass so every year around this time (July/August) the grass dies and looks awful.
The artificial turf and green sounded like a perfect plan - and that reno would be easy and not disruptive to family life.


It seemed like it was going to happen until the quotes came in and we realized that it was more than we thought and there were other things on the list that should be done first.

DHs Wish...

DH really wanted to do the laundry room/wine storage (or as he calls it "wine cave with laundry").  He has a lot of wine and wanted something "nicer" and more organized to store it.


Results....

After comparing quotes on both projects we decided to pitch the putting green and use the money to redo the laundry room. In the end the costs were almost the same!

That's how the laundry room reno came about.  It's still not done, but should be by the end of next week, so I'll post the completed wine side then.

Our current outstanding WISH LIST was re-prioritized and we also negotiated the next 2 years reno's - House Front (2015) and then Kitchen & Master Bath (2016).

Next year we're going to "try" and do the front of the house.  This will address some problem areas that need repair and add much needed curb appeal.

This is what's coming up for next year's reno -
Replace 3 windows
Paint and repair wood siding
Paint and repair wood trim and fascia
Remove red clay brick from front, arches (yes I have arches) and red clay floor tile porch.
Replace red clay brick front with gray stone (basalt like in backyard)
Replace red clay brick arches with stone and wood posts
Replace red clay floor tile with slate or another natural of "faux" stone tile
Replace front doors (double doors)

I'm going to start sharing my ideas and inspiration here and I'd love any feedback or tips you might have!


Thursday, August 7, 2014

Laundry Room Reno ALMOST Done!

Thursday, August 7, 2014

My laundry room is almost done.  The laundry side is now finished and functional.

The wine side is still in a holding position - we are waiting for the racks and fridge to be installed.

 It would be done except DH could not imagine what he wanted there until the room was demo'd.

So we had to wait from that first week of demo - and after I made him consult with an expert - for the wine racks to be made and shipped.

The tentative install date is now set for Friday, August 21.  Unless there is another delay....

Here are some photos of the completed laundry side.


You might notice that the paint is NOT BM Revere Pewter as I had earlier posted.

I had to make a switch to BM Bleeker Beige 


because the room ended up being too "warm" for the cool Revere Pewter paint colour.

Some of the fun things I did with this reno were:

Converted an unused closet into a pantry just outside the laundry room

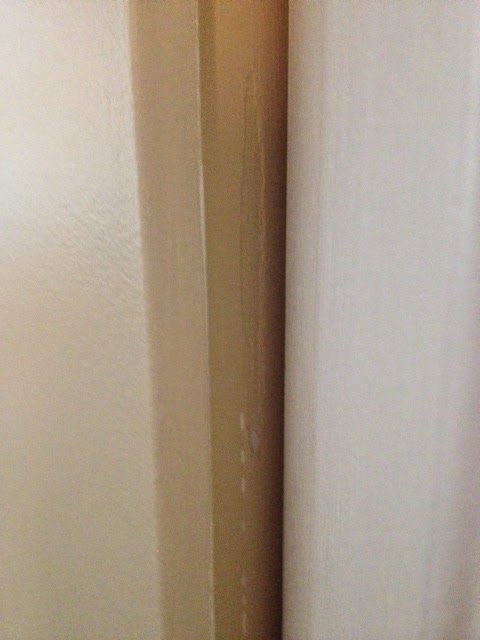
Kept the kids growth chart - on the inside door frame of the laundry room


Used drink dispensers for my laundry detergent and softener (that's my lost sock basket on the right)

Now we just have to wait for the wine side to be done...


I'll post more pics when its all done!

Monday, July 28, 2014

Laundry Room Reno Continues...

Monday, July 28, 2014

My laundry room reno continues into it's 4th week.....just 2 weeks over schedule.....

This is where we are at now.

A new 5 panel glass entry door was installed.


Wine rack wall was drywalled and space was prepped for wine fridge


Washer and Dryer were moved back in - that was the best thing that happened last week!!!


Today the granite comes - yes I'm having granite for countertops in my laundry room.  My husband bought a brand new wine fridge at a charity golf silent auction and saved $1,000 off the price of another we were looking at so I get granite countertops (his idea).

This week the baseboards will be added and then the room will be painted and the backsplash put on.

Here's a recap on the materials we are using in this room:

The room will be painted BM Revere Pewter.  I think it's a good "greige" for this room.


I had a hard time with the floor tile and trying to match up with the Harvest Gold Slate that was used throughout the rest of the house.
So I went with a "faux" slate porcelain tile called Bengal Sierra from Home Depot


Here's a pic of how it ties in with the slate on the step.  It's a pretty good match don't you think?


Here is the backsplash tile - Sassi Etrusca Villa Brick Mosaic
 Here's a sample of how it will look - I hope!


I think it will all look well together don't you?

I'll post  more pics when finished.

Laundry Room Reno - Wine Storage

My laundry room is a Dr Jekl & Mr Hyde type of project where one room is doing double duty.

On the one side it will be an all business LAUNDRY ROOM but on the other side it will be a sparkly WINE ROOM!

This is what the wine side will look like


I'll post more pics as the project progresses!

Friday, July 18, 2014

Laundry Room Reno - Converting BiFold Doors

Thursday, July 18, 2014

I've been very MIA lately.  There are so many things to do over the summer with the kids and around the house!

One of our major "minor" projects is to renovate the laundry room/wine room this summer.

With the help of a local contractor I am in the process of doing this right now.  I'll try and post some pics when its done...

One of the things that I was really looking forward to was converting my downstairs closet (just outside the laundry room) into a pantry (hubby's idea).


This closet has a traditional bifold door on it and I saw this post HERE where these doors can be converted into french doors.

My problem was that my doors are not mounted on a flush wall there is actually a lip and I would have to add some 1x1 to attach hinges to it.


I was going to do just that but then I figured out that I could just keep the stationary hardware of my bifold door (the part that doesn't move) and just add additional stationary hardware to the other side (the part that normally moves).  Of course, I had to take the doors off and remove the middle hinges first!

I went to Home Depot and this is all I had to buy to make this work:

 Top Pivot pin (you may already have this on your door)
 Bottom stationary bracket and pivot pin (my doors already had predrilled holes in the bottom!)
 Top stationary bracket


I'm happy to say that it's worked perfectly and is much easier that trying to install traditional hinges on both sides of the door.


Monday, February 3, 2014

Master Bath "Freshen" Up

February 3, 2014

A while back I refinished our master bathroom vanity from a boring builders honey oak to a dark brown Kona colour using a Rustoleum Cabinet Transformations kit from Home Dept.  I got the idea from Pinterest.  There are tons of samples on there.


Here are some before and after photos of my bathroom vanity...


(this is actually my kitchen cabinets but the bathroom vanity was exactly the same finish)

I added the brushed brass hardware from Ikea.

Here's a side view.  Can you see how the grain still shows?

Last week I decided to continue with my bathroom refresh by adding some accent tiles and changing the vanity faucet.

I replaced our old Delta "crystal ball" tap set with this Venetian Bronze set.  Ok I didn't do this, I hired a plumber to take out the old water lines and install this one for me...


The paint above my shower tile was always peeling from the moisture so last fall I had a ceiling exhaust fan put in (can you believe there wasn't one before?).
I sanded down the peeling paint and added I a complementary mosaic glass tile to fill in the gap.
This tile was only $5 sq/ft from Home Depot and I only needed 10.
Yes I actually did do the tiling here!  Years ago I took a night school class at a local high school on how to properly cut and install tiles.  This was my second tiling project - spaced 10 years apart - but I think it turned out pretty well.


I had a hard time choosing grout (I hate choosing grout!) but in the end I choose Tobacco over my other choice of Charcoal.

The Mosaic brown glass tile and Tobacco grout go well with the other FOUR different tiles in this master bathroom!

Now I just need to find replacements for the shower and bath tub taps...